Log OBD2 data
OBD2 is a protocol that lets you request data from most non-EV 2008+ cars.
In this section we outline how to log OBD2 data with your CANedge.
Table of Contents
Configure your device - quickstart
For a quickstart, use our ‘plug & play’ OBD2 Configuration File for the CANedge3:
FW 01.07, 500K (incl. GNSS/IMU)
Download the Configuration File to your SD card (replace the original) and safely eject the SD.
Request and record OBD2 data
- Connect the CANedge to the OBD2 connector in your car via the DB9-OBD2 adapter[1]
- Verify that the device turns on and logs data (see the LED section of the CANedge Docs)
- Disconnect the device and use e.g. an MDF4 converter to view the raw data
- If your car responds[2] you should see CAN frames with ID
7E8[3] in your data - Once confirmed, you can optionally optimize your Configuration File[4]
Analyze and plot OBD2 data
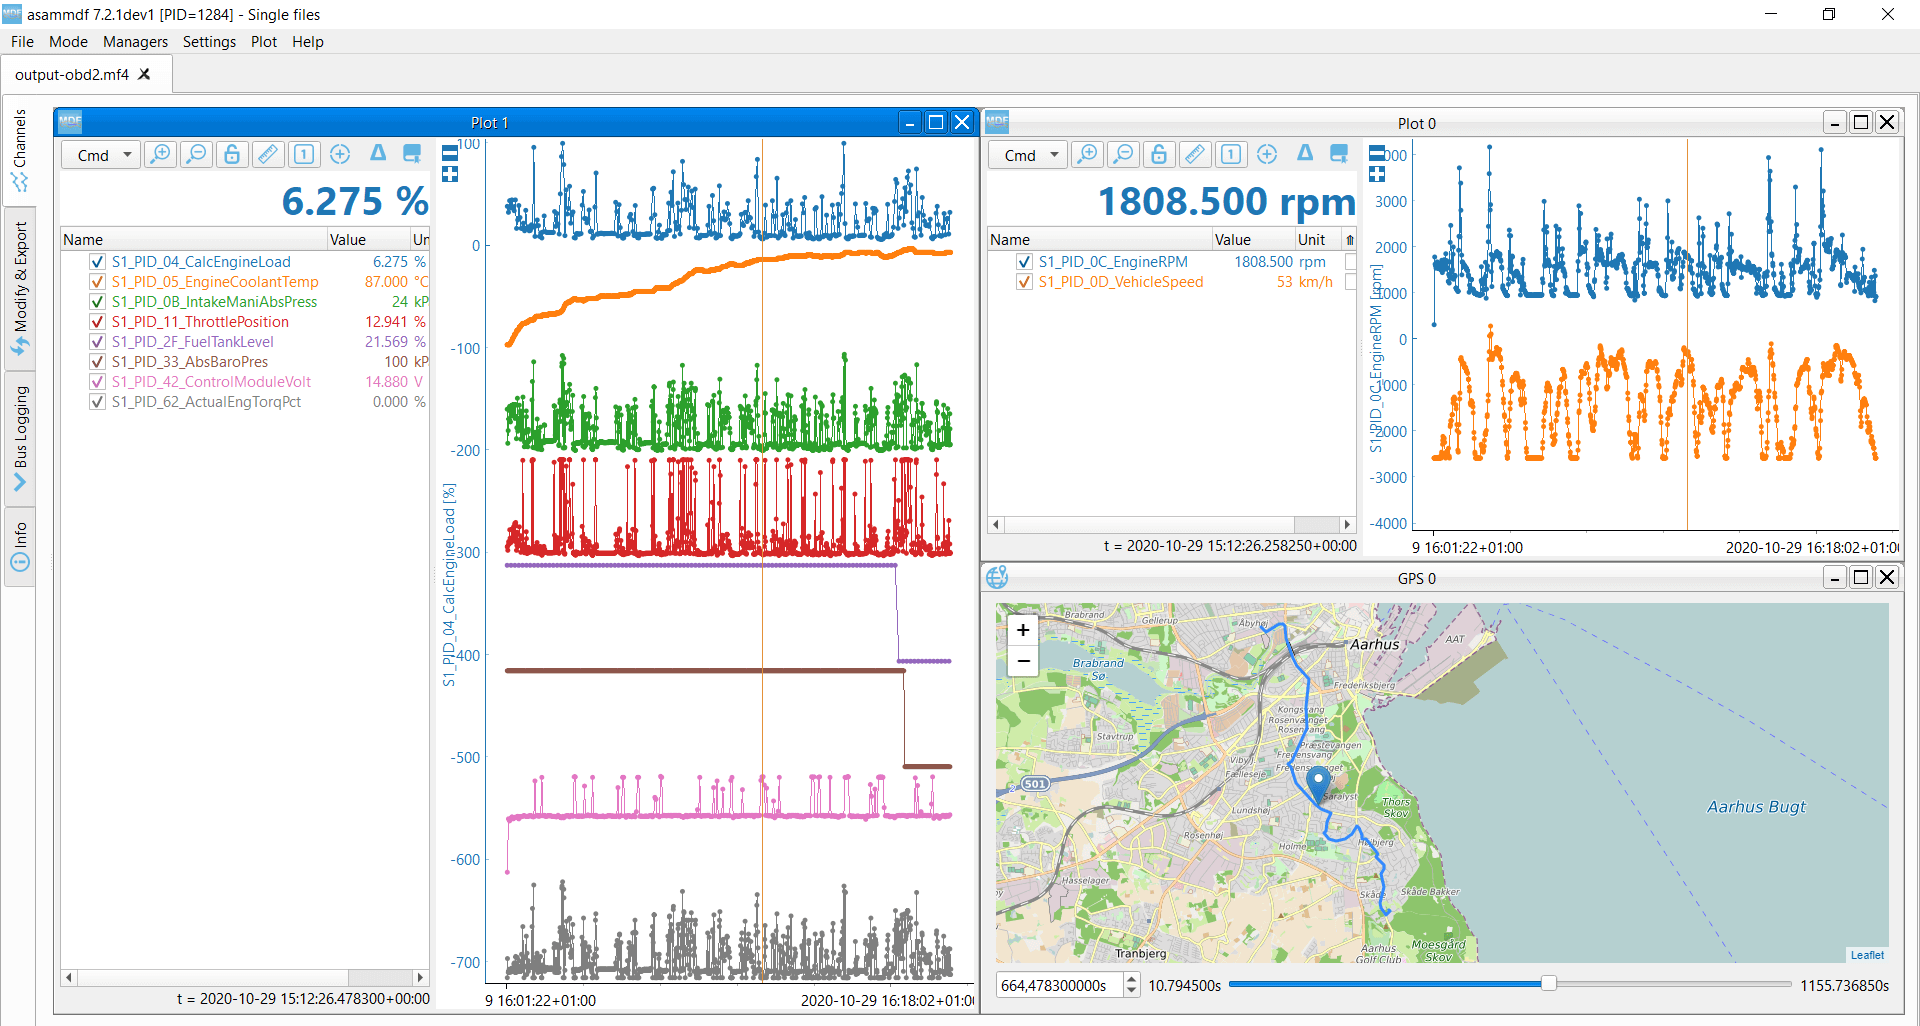
The asammdf GUI intro details how you can convert raw data from the CANedge into human-readable form - and e.g. perform plots. You can use our free OBD2 DBC files.
Add new OBD2 requests
If you want to add a new PID request, you can find an overview of (potentially) available PIDs here. You then open the above OBD2 Configuration File in the editor and go through below steps:
- Go to CAN CH1 and add a new entry to the transmit list
- Add a suitable name for the PID
- Copy all the field values from the list entry above
- In the data payload field, set the 3rd byte to match the hex PID value
Note that the requests should be ‘spread out’ so as to not overlap.[5]
Note
Note that for all transmit message you must ensure that offset < period
Cars vs. vans/trucks
Practically all cars communicate via 11-bit CAN IDs at a 500K bit rate. Here, your OBD2 Configuration File should utilize the 11-bit request ID 7DF and a 500K bit rate as per our ‘quickstart’ config above.
However, in e.g. vans, light trucks or heavy duty trucks, you will typically find that CAN 2.0B is used, meaning that identifiers are 29-bit. Here, the OBD2 request ID should be 18DB33F1 and responses will come via IDs 18DAF1xx (where xx may vary). Further, you’ll need to determine if the bit rate used is 250K or 500K before deploying the CANedge.
Below we provide quick start Configuration Files for 29-bit OBD2 requests. We also provide an Extended variant of our OBD2 DBC for decoding the responses.
OBD2 & battery consumption
The CANedge consumes <1W, which is not an issue for your car battery in practical use cases. In most cases, the device also turns off with your car (or 10-20 min after). However, if this is not the case and you’re requesting OBD2 data, the device may “wake up” the car sensors.
In such scenarios, there are a couple of options:
- You can simply disconnect the device between trips
- You can re-wire your vehicle’s OBD2 connector so that the power pin is linked to the ignition
- You can use a DB9-DC splitter and a cigarette-to-DC adapter to power the device
- You can turn the OBD2 transmit list on/off via a control signal as outlined in the CANedge Docs
Using GNSS speed to control OBD2 transmission
A common way to start/stop your OBD2 transmission on CAN CH1 is by using a GPS-based Speed signal. This signal will be easily available if you’ve connected a CANmod.gps to CAN 2 or if you’re using a CANedge incl. internal GNSS/IMU.
Below we provide two ‘partial’ Configuration Files. Both files start transmission on CAN 1 only when the Speed signal is above 0.1 m/s - and stops when below 0.09 m/s. Further, they also control the logging on other channels based on the same logic (CAN 2, CAN internal). This way, you avoid battery drainage and only record data if the car is moving. You can load this into your own Configuration File with the ‘Partial config loader’ editor tool.[6]
FW 01.07 (CANmod.gps on CAN 2) | FW 01.07 (incl. GNSS/IMU)
| [1] | We recommend using one of our DB9-OBD2 adapters. If using a 3rd party cable, it’s important to verify the pin-out. |
| [2] | Note that some older cars do not support OBD2 data acquisition via CAN bus, while some newer cars block CAN access via the OBD2 connector. For cars that do support OBD2 data, the extent of coverage varies. The “supported PID” single-shot requests can help provide information on what PIDs are supported. If your car does not respond to the OBD2 requests, we recommend to test in other cars to determine if the issue is specific to the car or e.g. the Configuration File |
| [3] | In some cases you’ll see IDs like 7E9 or 7EC instead. In this case, you may need to modify the OBD2 DBC to use alternative CAN IDs |
| [4] | For example, you may want to add filters to only record OBD2 responses. Also, you may want to add custom OBD2 PID requests - see our simple intro to OBD2 and the OBD2 PID Wikipedia page for details on this |
| [5] | In the plug & play config, this is ensured by having a sequence of transmit messages be sent out over a 5000 ms period. If you need to add more transmit messages than what fits in that list, you should expand the period accordingly |
| [6] | The partial config example may require adjustment (e.g. if your CANmod.gps uses another firmware than 01.03.01 or if you’ve modified the CAN ID for the message containing Speed). Further, you should always test this out to verify that it is working as intended before leaving the device for a longer period in your car. |